You hear a steady drip at 2 a.m., your water heater app flags a pressure spike, and your thermostat’s zoning data looks off. You can fix leaks, stabilize PSI with a regulator, purge air-charged lines, and recalibrate smart HVAC—all with a meter, wrench, and a few targeted settings. You’ll also seal pest ingress, refresh failing paint and caulk, and tune appliances for efficiency. The catch: sequence and thresholds matter more than ever.
Ready to tackle those nagging household issues once and for all? Visit FixItInTheHome for expert‑recommended fix‑it‑guides and DIY repair tips you can start applying today.
Fixing Leaky Faucets and Drips
Why is your faucet still dripping after you’ve shut it off? Diagnose like debugging: identify faucet type (compression, cartridge, ceramic-disc, ball).
Kill water supply, then remove handle. Inspect and replace worn O-rings, seats, and cartridges. Polish valve seat with fine grit or a seat-dressing tool.
Rewrap threads with PTFE tape, torque to spec—hand-tight plus a quarter turn. Clean aerator screens; flush lines to purge debris.
Apply silicone plumber’s grease on moving parts. Log faucet maintenance tips: quarterly inspection, yearly seal refresh.
Use drip prevention methods: pressure regulator set to 60 psi, install hammer arrestors, and verify thermal mixing doesn’t exceed manufacturer tolerances.
Stopping Running Toilets and Weak Flushes
After quieting faucet drips, move to the fixture that wastes far more water per hour: a running toilet or a weak flush.
Lift the tank lid, then run this checklist: water level 1 inch below overflow; chain slack 1/4 inch; flapper seals cleanly.
If dye in the tank leaks into the bowl, do a toilet flapper replacement. Verify seat smoothness.
For low power, perform a flush valve adjustment: open the fill valve, set float height, and confirm the refill tube targets the overflow.
Clean debris from the fill valve cap. Tighten tank bolts evenly.
Test, observe, iterate. Replace worn parts.
Clearing Slow Drains and Preventing Clogs
Before you reach for harsh chemicals, diagnose and clear slow drains with a systematic, non-destructive sequence.
Remove the stopper, clean hair and biofilm. Flush with boiling water if the pipe’s not PVC. Plunge with 10–15 firm cycles, sealing overflow.
Next, run a wet/dry vac to pull debris. Feed a 1/4-inch drain snake; rotate, hook, extract. Finish with enzyme-based drain cleaning overnight; rinse hot.
For clog prevention, install mesh strainers and a hair-catcher. Zero grease, coffee grounds, or wipes down drains.
Weekly: 1 minute hot flush. Monthly: enzyme treatment. Quarterly: trap disassembly and cleanout. Document fixtures, intervals, and results like maintenance logs.
Restoring Water Pressure the Smart Way
Even if a faucet sputters or a shower feels weak, treat low water pressure like a structured troubleshooting task.
Start at the meter: confirm the main valve’s fully open. Check aerators and showerheads; clean or replace clogged screens.
Test static and dynamic water pressure with a gauge; target 50–60 psi. If low house-wide, adjust the pressure-reducing valve a quarter-turn clockwise.
Compare hot vs. cold; if only hot is low, flush the water heater and inspect mixing valves.
Audit for hidden leaks via meter movement with fixtures off.
For smart solutions, add IoT leak sensors, a Wi‑Fi pressure monitor, or a booster pump.
Silencing Noisy Pipes and Water Hammer
Low pressure isn’t the only plumbing nuisance; impact shocks and vibration can make pipes bang, buzz, or hiss. You’re hearing water hammer: a fast-closure valve slams flow, sending pressure waves through rigid lines.
Start by anchoring loose runs and adding pipe insulation to damp resonance. Verify static pressure is 40–60 psi; adjust or replace the regulator if it’s high.
- Install hammer arrestors near quick-closing fixtures; choose code-listed, serviceable types.
- Slow valve closure: swap to soft-close cartridges, add flow restrictors where appropriate.
- Secure spans: add straps every 4–6 feet, isolate metal-to-wood contact with rubber.
Bleed air chambers and retest.
Resetting Tripped Breakers and Faulty GFCIs
Although a dark room or dead outlet looks alarming, diagnosing a trip is straightforward: identify the affected circuit, isolate the cause, and restore protection.
At the panel, locate the handle that’s not fully ON—move it firmly to OFF, then to ON; that’s resetting breakers properly. Unplug loads and retry to rule out overloads.
For a GFCI, press RESET; if it won’t hold, unplug downstream devices and press TEST, then RESET—testing GFCIs confirms function. Replace devices that fail to trip on TEST.
Persistent trips suggest shorts, ground faults, or a bad breaker. Label circuits, tighten terminations de-energized, and call an electrician when uncertain.
Solving Flickering Lights and Dimmer Issues
When lights flicker or buzz—especially on dimmers—treat it as a compatibility or connection problem first, not a mystery.
Verify the lamp type matches the dimmer switches: many LED drivers need ELV or 0–10V dimmers, not legacy TRIAC. Check fixture wattage exceeds the dimmer’s minimum load. Tighten wirenuts, re-terminate loose conductors, and ascertain neutral availability for smart dimmers. Replace flickering bulbs with “dimmable, ELV-compatible” LEDs.
- Confirm model numbers: lamp + dimmer are on each other’s compatibility lists.
- Set trim/low-end calibration to prevent dropout and shimmer.
- Isolate noise: test with a standard switch; if stable, replace the dimmer.
Eliminating Wi‑Fi Dead Zones With Mesh Upgrades
Even before you blame your ISP, map your home’s signal and upgrade to a mesh system to replace a single overworked router with coordinated nodes. You’ll extend wi fi range, slash latency, and gain seamless roaming. Place nodes midway between the gateway and dead zones, elevate them, and avoid metal or microwaves. Use Ethernet backhaul when possible; otherwise, dedicate a 5 GHz backhaul. Enable band steering and fast roaming (802.11k/v/r). Update firmware and lock channels to reduce interference. These mesh network benefits deliver predictable throughput.
Area dBm Before dBm After
Hallway -79 -62
Bedroom -83 -66
Garage -88 -69
Draft‑Proofing Windows and Doors for Efficiency
Before chasing HVAC upgrades, seal the obvious air leaks at windows and doors to cut heat loss, improve comfort, and lower bills.
Start with a smoke pencil or incense; trace frames and thresholds. If smoke wavers, you’ve got a leak. Measure gaps, then choose weather stripping by type and thickness: V‑seal for sashes, bulb for doors, foam for uneven frames. Caulk stationary joints with silicone or acrylic latex.
- Replace brittle door sweeps; set a uniform 1/8-inch reveal.
- Tighten strike plates; adjust hinges to eliminate daylight.
- Add low‑E film; boost energy efficiency without replacing glass.
Test, iterate, and document settings.
Sealing Air Leaks in Attics and Basements
Although heat rises, major air leaks in attics and basements often drive the biggest stack-effect losses, so target those paths first with a methodical audit and seal. Map penetrations: top plates, can lights, chaseways, rim joists, and utility cutouts. Use smoke pencil or IR camera to confirm. Seal gaps ≤1/4” with acrylic-latex caulk; larger voids with fire-rated foam; big openings with sealed rigid foam. Maintain attic insulation continuity and air-barrier alignment. At the basement, pair air sealing with balanced basement ventilation to prevent backdrafts.
| Task | Spec |
|---|---|
| Attic can lights | IC-rated covers, sealed |
| Rim joists | 2” foam + foam/caulk |
| Chaseways | Rigid foam, taped, foamed |
Stopping Running Toilets and Weak Flushes
0
When energy costs spike, you need data, not guesses. You’ll cut energy consumption by instrumenting your home like a system.
Install a whole‑home monitor at the breaker; map circuits to labels, then sample usage per minute. Pair smart devices—thermostats, plugs, and submetered EV/heat pump loads—and automate with schedules, occupancy, and price signals.
- Set alerts: if HVAC exceeds a watt threshold for N minutes, notify and downshift.
- Build scenes: “Away” disables standby loads via smart plugs and tightens thermostat setpoints.
- Track baselines: export CSV, plot kWh/day, compare by weather degree days.
Iterate weekly; adjust automations; verify savings against utility bills.
Stopping Running Toilets and Weak Flushes
1
Even small gaps between subfloor, joists, and fasteners act like loose interfaces that chirp under load, so you’ll diagnose the exact source and lock the assembly tight.
Pinpoint squeaks by stepping, then mark. From below, add construction adhesive to joist–subfloor seams; clamp with screws from beneath or use breakaway squeak screws from above, avoiding utilities.
Pre-drill and drive fasteners at 10–15° to pull layers together. Shim minor gaps with carpenter’s glue. Add blocking between joists near noisy zones. Upgrade floor insulation to damp vibration.
For stairs, apply stair reinforcement: tighten tread-to-stringer screws, glue wedges, add cleats, and anchor loose newels.
Stopping Running Toilets and Weak Flushes
2
Silencing floors stops the chorus underfoot; next, you’ll tackle the hairline maps on walls and ceilings by matching repair to substrate and cause.
Identify drywall vs. plaster: gypsum board joints crack; plaster keys fail. For drywall, use drywall patching techniques: widen crack to a “V,” vacuum dust, embed fiberglass mesh in setting compound, feather 6–10 inches, sand, prime.
For plaster, choose plaster repair methods: reattach with plaster washers or adhesive, apply basecoat, then finish coat.
- Test movement; if cracks open/close, address framing or humidity.
- Use setting-type compound for speed and strength.
- Prime stains and repairs to guarantee uniform sheen.
Stopping Running Toilets and Weak Flushes
3
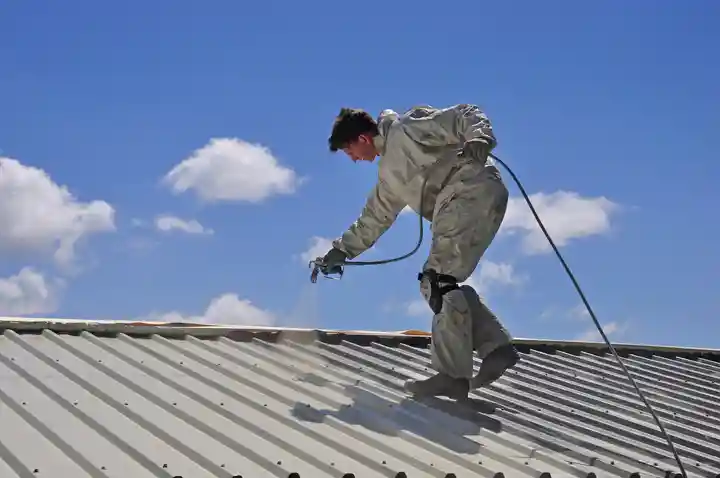
Although rain reveals the problem, you prevent roof leaks and gutter overflows by tracing water paths, correcting drainage, and sealing penetrations with the right materials.
Start with a roof inspection: check shingles, flashing, ridge vents, and penetrations. Reseal flashing with polyurethane or butyl; replace cracked shingles; clear debris at valleys.
For gutter maintenance, set slope 1/16–1/8 inch per foot, tighten hangers to code spacing, and install oversized downspouts with leaf guards. Add splash blocks or extensions 6–10 feet from the foundation.
Use high-temp ice-and-water shield at eaves and around chimneys. Test with a controlled hose run, section by section.
Stopping Running Toilets and Weak Flushes
4
Because mold is a moisture and airflow problem, you prevent it by controlling humidity (30–50% RH), eliminating wet spots within 24–48 hours, and ensuring continuous ventilation per ASHRAE 62.2.
Use sealed exhausts, balanced ERV/HRV, and smart sensors to automate mold prevention. Verify source control: fix leaks, insulate cold surfaces, and slope condensate drains.
-
Deploy MERV-13 filters and HEPA room units for targeted air purification and spore capture.
-
Program dehumidifiers to 45% RH; add floor drains and auto-shutoff leak detectors.
-
Maintain airflow: keep supply/return paths open; clean coils, ducts, and bath fans.
Document setpoints, test with hygrometers, and iterate.
Stopping Running Toilets and Weak Flushes
5
When doors stick or locks bind, diagnose from simplest to most likely: confirm the key and latch operate freely (clean, lube with dry PTFE), test door swing without the latch engaged, then inspect reveal gaps (aim ~1/8 inch uniform) and strike alignment.
Verify hinges: tighten screws, replace stripped holes with glued hardwood dowels, then rescrew.
For door alignment, shim hinges to move the slab; remove shims to close a reveal.
Adjust the strike plate: shift or file the slot; keep 1/16–1/8 inch clearance.
Apply lock lubrication to the cylinder and latch; avoid graphite on electronic finishes.
Finally, plane swollen edges, seal.
Stopping Running Toilets and Weak Flushes
6
After tuning doors to swing and latch correctly, apply the same systematic mindset to indoor comfort: calibrate smart thermostats and verify zoning performance.
Start by confirming sensor placement, then run a two-point calibration: compare readings to a trusted thermometer at low and high setpoints. Update firmware, map zones, and label dampers. Validate airflow and static pressure.
-
Audit smart thermostat features: sensor averaging, geofencing, adaptive recovery, staging control.
-
Test HVAC zoning benefits: room-level comfort, reduced short-cycling, targeted schedules.
-
Log data: temp deltas, runtime, damper states; adjust rules.
If rooms drift, rebalance dampers 10–15%, recalibrate offsets, and retest across daily cycles.
Stopping Running Toilets and Weak Flushes
7
Even if you don’t see pests, treat the building like a network with attack surfaces and patch them methodically.
Map ingress points: gaps >1/4”, torn screens, unsealed utility penetrations, door sweeps, soffits, vents, weep holes. Prioritize by risk and seal with stainless steel wool + sealant, hardware cloth (1/4”), silicone/urethane caulk, backer rod, weatherstripping.
Install brush door sweeps; add vent screens; cap chimneys with spark arrestors.
Deploy humane traps for live capture near known paths; release per local regs. Use natural repellents (peppermint oil, cedar, vinegar, diatomaceous earth) where sealing isn’t feasible.
Fix moisture: grade, gutters, dehumidify. Log changes; re-inspect quarterly.
Stopping Running Toilets and Weak Flushes
8
Although peeling paint and split caulk look cosmetic, treat them as system failures that expose substrates to moisture and vapor. You’ll map failures, then execute a stable repair sequence: isolate, remove, dry, seal, finish.
Scrape to sound edges, feather-sand, vacuum dust, and verify dryness with a moisture meter (<15%). Prime bare areas with bonding primer. Perform caulk replacement using paintable, mildew-resistant, elastomeric sealant; tool smooth.
-
Diagnose: note humidity sources, thermal bridges, and failed substrate prep.
-
Prep: mask edges, use HEPA vacs, maintain 40–80°F, 40–60% RH.
-
Finish: controlled paint touch ups or full-coat, maintaining wet edge, 2 coats.
Stopping Running Toilets and Weak Flushes
9
A disciplined maintenance routine keeps appliances efficient, safe, and in service longer.
Start with a quarterly checklist: vacuum refrigerator coils, descale dishwashers and kettles, clean dryer vents, replace HVAC filters, and run washer drum-clean cycles.
Verify voltages, tighten terminals, and inspect cords for heat or abrasion.
Calibrate oven temps with a probe; flush water heaters and test anode rods.
Firmware matters: update smart devices, disable deprecated APIs, and log error codes.
These appliance maintenance tips cut load and heat.
Schedule professional inspections annually.
For energy efficient upgrades, install variable-speed motors, induction cooktops, heat-pump dryers, smart plugs, and leak-detect sensors.
Clearing Slow Drains and Preventing Clogs
0
You’ve now got a punch list and the tools to execute it like clockwork. Patch leaks, tune pressure, squash clogs, and silence pipes; then calibrate thermostats, seal air gaps, and harden entry points. Maintain appliances, refresh paint and caulk, and monitor IAQ to keep mold at bay. Treat your home like a codebase: iterate, test, and deploy fixes before failures cascade. With smart sensors, routine checks, and precise adjustments, you’ll keep systems humming and costs—and risks—on a tight leash.